Crack path morphology in silicon carbide whisker-Reinforced aluminum composite
- PDF / 1,404,011 Bytes
- 3 Pages / 594 x 774 pts Page_size
- 0 Downloads / 358 Views
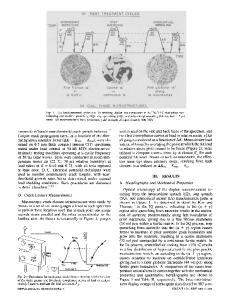
dicates that the SiC whiskers are aligned in the extrusion direction. The determined ultimate tensile strength and 0.2 pct offset yield strength of the specimen material of L-T transverse orientation are 605 MPa (87.8 ksi) and 576 MPa (83.5 ksi), respectively. In the tension-tested specimen, the crack path is transverse to the loading or extrusion direction. No significant deflection in crack path is noticeable, as shown in Figure 3. In the center-cracked-tension specimen for fatigue testing, two fatigue cracks emanate initially from the two opposite tips of the center notch shown in Figure 4. Subsequently, without appreciable growth, these cracks deflect about 100 deg in opposite directions and grow toward the opposite ends of the specimen. As a result, the two crack paths are parallel to each other and inclined about 10 deg to the loading direction. In the final overload fracture stage, the two cracks deflect transversely toward the opposite edges. Such a tortuous fatigue crack path is not changed by reducing the specimen thickness from 4.8 mm (3/16 inch) to 1.6 mm (1/16 inch). A somewhat similar deflection of the fatigue crack path is also observed in the specimen with a straight or semicircular single edge notch. The tortuousness of the fatigue crack path is attributable to the alignment of SiC whiskers in the extrusion direction. A fractograph of the tension-tested specimen is shown in Figure 5. The transverse fracture surface is entirely covered by dimples. Some of them contain SiC whiskers 138 • 0.2
47
~I ~
44 ~
47
/~6Rt
T
22 _+ 0.02
4~
_~•
0.02
~
3
I
I 4.11 _+ 0.02
r (a) L,
138 • 0.2
47 ~
-- l ~
44
',.
I I
47
1' 1 22 • o.02
35 • 0.02
1 &R
I
I*~.* • 0.02
I
G e o m e t r y of Center Notch Dimensions in turn
0.25
EUN U. LEE, Materials Engineer, is with the Aerospace Materials Division, Air Vehicle and Crew Systems Technology Department, Naval Air Development Center, Warminster, PA 18974-5000. Manuscript submitted December 18, 1989. METALLURGICAL TRANSACTIONS A
(b) Fig. 1 - - ( a ) A rectangular tension-test specimen and ( b ) a center-
cracked-tension specimen for fatigue test.
U.S. GOVERNMENT WORK NOT PROTECTED BY U.S. COPYRIGHT
VOLUME 21 A, JUNE 1 9 9 0 - - 1783
(a)
Fig. 3 - - C r a c k growth path in a tension-tested specimen.
process. The matrix shows facets and steps but no visible striation. After the deflection of the crack path to a nearly longitudinal (or loading) direction, white rods (longitudinal images of SiC whiskers) and striations are visible in the matrix, indicating stable fatigue crack growth. Those SiC whiskers*have smooth longitudinal surfaces with scattered debrislike particles. Such a smooth longitudinal surface is due to debonding of the SiC whiskers during fatigue crack growth. Therefore, it is evident that the fatigue crack grows parallel to or along the longitudinal interface of the aligned SiC whiskers but not through them. As the crack grows further in the same direction,
(b) Fig. 2 - - S c a n n i n g electron micrographs of (a) a plane perpen
Data Loading...

