Direction of grain-boundary migration in the weld metal of an austenitic stainless steel
- PDF / 791,945 Bytes
- 6 Pages / 612 x 792 pts (letter) Page_size
- 102 Downloads / 396 Views
I.
INTRODUCTION
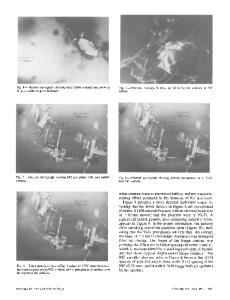
IT is often observed that the grain boundary (GB) migrates in the weld metal of an austenitic stainless steel. This GB migration affects the intergranular corrosion. That is, the migration GB seceded from the solidification GB, which is rich in segregation impurities, shows superior corrosion resistance to the GB not seceded.[1] Thus, controling the GB migration is important for improving the corrosion resistance. On the other hand, the GB migration behavior in the weld metal is not well known. The authors have examined the GB behavior in the weld metal from the view of the morphology of the solidification.[2,3] These investigations revealed that GB migration mostly occurred to reduce the GB energy. In addition, the obtained results were in accordance with these of other articles[4–7] relating to the GB migration in a polycrystalline metal. However, no articles have reported on the moving direction of the GB migration in the weld metal. Recently, the vertex dynamics model[8,9] was proposed and applied to represent two-dimensional grain-growth behavior based on the reduction of the GB energy. This method is expected to predict the individual behavior of the triple junction. In this article, we will manifest the moving direction of the GB formed just after solidification in the weld metal of an austenitic AISI310S stainless steel, using the vertex dynamics model. First, using the base metal, the simulated grain growth is compared to the experimental results in terms of the growth rate and the distribution of the edges in a grain. Second, the simulation method is applied to the moving direction of the individual triple junctions in the weld metal. II.
EXPERIMENTAL PROCEDURE
The material for the welding is an austenitic stainless steel, AISI310S (25.03Cr-19.15Ni-0.042C-0.93Mn-0.81Si0.016P-0.0014S, in wt pct), from plate stock. The welding was done on a rectangular plate measuring 80 3 70 mm (1 mm thickness), shown in Figure 1. The bead width was
SHINICHI SHIBATA, Assistant Professor, is with the Faculty of Engineering, University of the Ryukyus, Nishihara Okinawa 903-0213, Japan. TAKEHIKO WATANABE, Professor, is with the Faculty of Engineering, Niigata University, Ikarashi Niigata 950-2102, Japan. Manuscript submitted February 27, 1998. METALLURGICAL AND MATERIALS TRANSACTIONS A
kept to 4 mm. The surface of the welded specimen was observed in this study. Two methods of revealing the microstructure were employed for the observation. One was electrolytic etching of the polished surface with a 10 pct solution of oxalic acid, to make both dendrite structures and the room-temperature GBs appear. Another was high-temperature oxidation, to obtain not the dendrite structures but only the room-temperature GBs. In this method, the specimens were annealed in air for 500 seconds at 700 7C. Then, all the room-temperature GBs were oxidized and easily identified. Moreover, to confirm the validity of the simulation results, the weld was annealed in air for 5 and 12 hours at 1310 7C and 1350 7C, respectively. Afte
Data Loading...


