Indentation at the Nanometer Scale on Ultra Thin Films of Diamond-Like Carbon
- PDF / 1,659,949 Bytes
- 6 Pages / 414.72 x 648 pts Page_size
- 10 Downloads / 298 Views
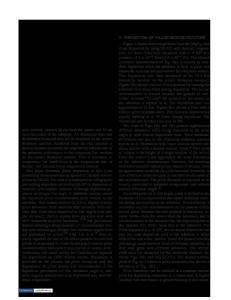
EXPERIMENTAL Nanoindentation experiments and images of the surface topography are performed with a new three-axial instrument derived from a Surface Force Apparatus, developed in our laboratory. Figure 1 shows a schematic diagram of the apparatus. Three-axialcapacitive -....... 3 PI FEEDBACK I displacement sensor y , ", i°!!i! ,,------Three-axialpiezo-: Approach electrictranslator
Fmiretar
dfoE
tr
5 CAPACITANCE ZxMEASUREMENTS WITH Fz FREQUENCY --DISCRIMINATION Fx ,
X
Ticele micrometer
a ,•,,,,.,,
2fore d ndor
Fx wuith Fz and qusistti.yn.i.cnto
le
acapacitive a meaureenttive
Leadingo
cantilevers
3CHANNELRAMP
SINE WAVEAND GENERATOR
h
/•/a / ueauecthen ~
////////////////////,] ////i'i'////////////J
,of~/ adouble
4 TWO PHASE
LOCK-IN
ll• ANALYSERS --
""cantileverrp /////////spring quasi-static dynamnic behavior behavior
cotl
////////////////////COMPUTER
dislaemetsto e eaure
wthot ny urhe dispauements BedigIecus oi la Figure I cDiagram of the three-axial instrument derivedfrom Surface Force Apparatus. Twofore tansuces secillybuit ad bsedon the caaitivemaueeto elasi Three piezoelectric elements aren used to moveo derylowcompiances, 108Nan the sphere n in 5106 the case /of Fx. aheyhav ighresluton siteof interface studies) in the three directions x, y and z. They allow a maximum displacement of 10dgm. Three sensitive capacitive transducers measure the relative displacements of the diamond tip and sample holders in the three directions. These three transducers and the very low compliance of the sample as well as tip mountings (lower than 2.10-7 m/N) allow the relative displacements to be measured without any further displacements. Bending because of load frame compliances is insignificant. The resolutions reached are better than 0. uenm. Two force transducers specially built and based on the capacitive measurement of elastic bending of two double cantilevers are used to measure the normal and tangential forces : Fz and Fx. They have a high resolution in spite of very low compliances, 10-8 N and 25.10-6 m/N respectively.
Three closed loops ale used to feed the high voltage amplifiers via PI controlers and then supply the three piezoelectric elements. Two displacement closed loops control the tangential displacements x and y, while the operation in the normal direction z can be selected either in displacement or normal force control. The standard setup used in this test obviously includes the continuous quasi-static measurements of the displacement and the resulting normal force, at a slow penetration speed, generally 0. 1 to 0.5 nmi/s. But it also includes the simultaneous measurements of the theological behaviors of the tested surface. In order to do that, small sinusoidal motions are added to normal and tangential displacements. Extremely light dynamic motions such as 0. 1 nm can be used. The resulting displacements and forces are measured using double phase synchronous analysers which give the in-phase and out of phase signals of both the normal and tangential mechanical transfer functions of th
Data Loading...


