Plane strain tensile testing for measuring environment sensitive fracture
- PDF / 933,478 Bytes
- 3 Pages / 594 x 774 pts Page_size
- 79 Downloads / 315 Views
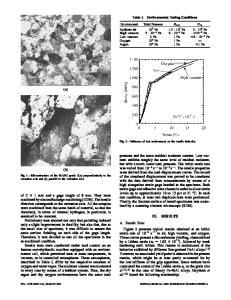
A516 steel. The composition and smooth bar tensile properties in air are given in Table I. Three tensile geometries were used: a smooth bar with a 4.9 mm (0.195 in.) diam and 25.4 mm (1.00 in.) gage length; b notched tensile bar, with a 3.8 mm (.150 in.) minimum diam, 0.005 mm (.002 in.) root radius and 60 ~ flank angle, and 4.9 mm overall diam and c plane strain tensile bar, with a thin web of dimensions 20.3 x 5.0 x 1.27 mm (0.800 x 0.200 x 0.050 in.). This web is flanked by large shoulders of the specimen, which constrain lateral contraction of the web during plastic deformation. '4 Duplicate samples were run in air and in 0.10 MPa (1 atm) flowing hydrogen. The crosshead rate for tests of smooth bars was 1.27 m m / m i n (0.05 in/min) while the notched and plane strain samples were tested at 0.5 and 0.127 mm/min, respectively. The rate was adjusted to keep the duration of all tests constant, approximately 30 minutes. In this way the total exposure time and therefore hydrogen uptake was kept constant. Since over this strain rate range the variation in ductility with strain rate is small for similar materials (see Ref. 7) the total hydrogen content was considered a more critical parameter. Measured values of tensile ductilities are given in Table II. Reduction-in-area of the smooth and notched specimens are calculated from (d2o - d~)/d2o where do and dj are the original and final diameters. A reduction-in-thickness is given for the plane strain samples, (t o - t l ) / t o where to and ts are the original and final through-thickness values at the center of the web. Because the lateral strains are nearly zero, the throughthickness strain is numerically equal to the longitudinal strain in the plane sample geometry. 14 A percentage ductility loss on testing in hydrogen vs air is also given in the table. Scanning electron microscope analysis showed that in the hydrogen tests a zone of quasicleavage plus ductile tearing extended 0.1 mm (0.004 in.) from the surface in all the samples geometries. Figure 1 is a typical view of such a zone on the smooth tensile sample. The remainder of the fracture surface exhibited ductile dimples which resulted from void growth and coalesence. The results in Table I indicate a strong effect of specimen geometry on percentage ductility loss in hydrogen. This geometry dependence can be rationalized in two ways. First, the section thickness of the plane strain samples is smaller than either smooth or notched samples. A hydrogen affected region of 0.1 mm depth represents 16 pct of the fracture area, vs 8 to 10 pct for the smooth and notched samples. This suggests that smaller gage dimension samples should be more
Table I. Properties of A516 Steel Chemistry, Wt Pct C Mn 0.21
1.04
Si
P
S
Fe
0.21
0.012
0.02
Balance
Mechanical Properties Yield Strength
Ultimate Strength
346 MPa (50.1 ksi)
528 MPa (76.5 ksi)
ISSN 0360-2133 / 81 / 0 3 1 1 - 0 5 4 3 5 0 0 . 7 5 / 0 9 1981 AMERICAN SOCIETY FOR METALS AND THE METALLURGICAL SOCIETY OF AIME
VOLUME 12A, MARCH 1981--543
strain ratio, C 2
Data Loading...


