Plastic work of fatigue crack propagation in steels and aluminum alloys
- PDF / 596,670 Bytes
- 7 Pages / 594 x 774 pts Page_size
- 71 Downloads / 346 Views
AK 4 -
A
- -
[11
o21~ U
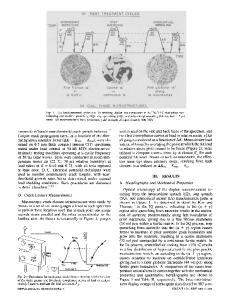
has been derived based on an accumulated displacement or energy criterion and thermodynamics. This equation applies to the mid-AK region where the Paris relation is valid. Here o is an appropriate yield stress, ~t is the shear modulus, U is the plastic work to advance a fatigue crack by a unit area, A is a dimensionless constant, and AK is the stress intensity range. While the observed exponent on AK, m, in the Paris relation, d c / d N cc (AK),,, is close to 4 for many materials, values less than 4 are also observed. The most recent theory of Weertman g accounts for m < 4 by introducing a dependence of U on AK, which is not present if m = 4. The exponents 2 and 4 represent limiting cases, the actual value depending on where in the stress cycle the crack begins to propagate? Experimentally, U was first measured by Ikeda, Izumi and Fine 9 by strategically cementing small strain-gages (200/~m • 210/~m) ahead of a fatigue crack and recording the stress-strain relations as the fatigue crack approached the gages keeping AK constant. As described elsewhere,9-~4the local plastic work density, U x r, vs position (X, Y) in the plastic zone ahead of the crack tip was determined. Integrating U x r over the plastic zone gives U. Because the strain gage fails when the crack enters it, the contribution to U from close to the crack tip cannot be directly measured. An extrapolation procedure 9:z was devised to establish this contribution. A more direct measurement may be made using electron channeling) 5 The contribution to U from close to the crack tip determined by electron P. K. LIAW is with the Structural Behavior of Materials Department, Westinghouse Electric Corp. Research and Development Center, Pittsburgh, PA 15235. S. I. KWUN is Assistant Professor, Department of Metallurgical Engineering, Korea University, Seoul, Korea. M. E. FINE is the Walter P. Murphy Professor of Materials Science and Engineering, Northwestern University, Evanston, IL 60201. Manuscript submitted January 8, 1980. METALLURGICAL TRANSACTIONS A
channeling and by extrapolation of foil strain gage data were nearly the same in low C steel) 2 While the local plastic work density U x r increases as the crack tip is approached, the integration volume decreases so that most of U comes from further than 100/xm from the crack tip. ~2 For thin specimens U x r refers to plane stress conditions and for thick specimens to plane strain. Izumi and FinO ~ investigated the effect of specimen thickness on d c / d N in 2219 A1 alloy. The rate for 1 mm thick specimens was 30 pct slower than for 3 and 6 mm thick specimens. The difference was attributed to plane stress vs plane strain and a 30 pct larger U for the thinnest specimens. Previously, ~~Izumi and Fine substituted the measured U's for 7 high strength aluminum and iron alloys and the 0.2 pct offset cyclic yield stress, o~, into Eq. [1] giving A of (2.5 _ 0.9) • 10 -3 where 2.5 is the mean value and 0.9 is the standard deviation. The plastic work per unit area of fatigue crack propagation,
Data Loading...


