Properties of Surface Melted SG Iron
- PDF / 1,366,124 Bytes
- 7 Pages / 417.6 x 639 pts Page_size
- 43 Downloads / 347 Views
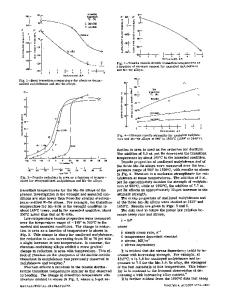
PROPERTIES OF SURFACE MELTED SG IRON B.L. MORDIKE AND H.W. BERGMANN Institut fUr Werkstoffkunde und Werkstofftechnik, Technische Universitat, Agricolastr. 2, 3392 Clausthal-Zellerfeld, FRG ABSTRACT The surface melting of cast irons is discussed with particular emphasis on composition and effect of impurities. The hardness and wear properties are outstandingly good as shown from tracks under normal working conditions. INTRODUCTION Since it was discovered about the turn of the century that it was possible to use an arc discharge to transform the surface of grey cast iron to white cast iron, many attempts have been made to overcome the variations in normal chill casting [1] by local melting techniques such as electron beam and TIG [2]. Whereas electron beam melting was unsuccessful on an industrial scale due to extensive porosity, TIG melting has proved to be a viable process [3,41. More recently, laser melting has been attempted with the aim of higher automation, better reproducibility and possibly better properties [5]. The following examples show that a systematic approach can produce excellent results and that it is also a commercially viable proposition. EXPERIMENTAL PROCEDURE The material used for these experiments contained 3.5% C, 2.4% Si, 0.4% Mg, 0.5% Mn and in the case of spheroidal irons < 0.001% P and < 0.001% S. The surface layer must be crack free, pore free, smooth and have a uniform thickness and microstructure. This requires uniform feed and power to ensure a constant melted depth and rate of quenching. Avoidance of pores requires that no significant evaporation of alloying elements occurs. The formation of cracks is related to the formation of martensite, which in iron depends on the composition, presence of traces of Cu, Mo, Ni, Cr, and on the general melting procedure, eg fixing, sequence of passes, plasma formation. In order to establish the optimum conditions the following parameters were varied: a) graphite shape - size and distribution b) inoculants c) trace elements originating from the mould metal. The laser used in this work was mainly a Coherent Everlase CO2 laser with a power of 700 W in the continuous and 4 kW in the pulsed mode. The beam was focussed to 0,5 mm and rastered over the surface to be modified. Some experiments were carried out using a Heraeus 5 kW CO laser. This is to demonstrate the effect of much thicker remeited layers. The wear properties were determined by rolling treated rollers against each other (Amsler wear test). The force between them could be varied as could the relative slip S. A vertical 2 load of 800 N/mmu 2 and 500 N/mm was usually employed. Rolling
Mat. Res. Soc. Syup. Proc. Vol. 58 ' 1986 Materials Research Society
430
wear is a common form of wear. The results of abrasive wear tests are reported elsewhere [5]. Fatigue behaviour was determined in push-pull on standard Instron machines. A metallographic investigation was made of the laser melted layers and correlated with the mechanical properties, wear, hardness and fatigue. RESULTS AND DISCUSSION The m
Data Loading...


