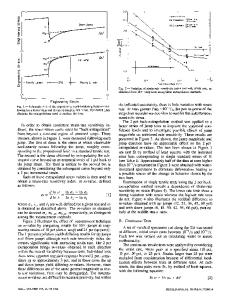
Strain localization in sheet metal containing a geometric defect
- PDF / 534,440 Bytes
- 4 Pages / 612 x 792 pts (letter) Page_size
- 8 Downloads / 291 Views
ns relevant to a reactivity-initiated accident in a nuclear power reactor.[10] Under such conditions, a sudden increase in the fission rate results in a rapid expansion of the uranium dioxide fuel, which impinges upon the ZIRCALOY cladding, deforming it in a “transverse” plane-strain condition. In that case, it is relevant to study the possible influence of a band of weak material (resulting, for example, from corrosion or hydriding) on the ductility of the thin-wall
T.M. LINK, formerly a graduate student in the Department of Materials Science and Engineering, The Pennsylvania State University, is Research Engineer, U.S. Steel Technical Center, Monroeville, PA 15146. D.A. KOSS, Professor, Department of Materials Science and Engineering, and A.T. MOTTA, Associate Professor, Department of Mechanical and Nuclear Engineering, are with The Pennsylvania State University, University Park, PA 16802. Manuscript submitted April 7, 1999. METALLURGICAL AND MATERIALS TRANSACTIONS A
tubing.[11,12] The associated testing involves experiments that we believe support the M–K predictions under “ideal” conditions, as described subsequently. In particular, we describe the results from a series of tensile tests of thin ZIRCALOY-4 cladding specimens, containing a single linear groove, of uniform depth and width, oriented perpendicular to the major principal strain direction. These tensile tests were conducted such that the specimens were deformed under near plane-strain conditions. In this configuration, plane-strain deformation can be maintained both within and outside the groove while strain localization develops. These tests allow us to experimentally determine the influence of groove depth (i.e., imperfection severity) on localized necking and to compare those results with the predictions of M–K theory. The material we tested was cold-worked and stressrelieved ZIRCALOY-4 cladding tubes with an outer diameter of 9.5 mm and a wall thickness of 0.56 mm. The grain structure consists of elongated grains with an approximately 10:1 aspect ratio parallel to the tube axis; the elongated grains were approximately 10- to 15- mm long and 1- to 2mm thick; thus, a large number of grains are present across the thickness of the specimens. In the cold worked and stress relieved condition, the ZIRCALOY-4 cladding used in this work exhibits a crystallographic texture such that the plastic anisotropy parameter, R, as determined in the hoop direction of the cladding is R 5 2.3. The strain hardening exponent, n 5 d ln s/d ln «, was measured using small compression samples, approximately 1-mm long with widths and thicknesses ranging from 0.5 to 0.7 mm, and oriented in the hoop direction of the cladding tube. These data indicate a strain hardening exponent n 5 0.068 at a strain rate of 1023/s. At room temperature, there is a small degree of strain-rate hardening such that m 5 d ln s/d ln «˙ 5 0.02. As shown in Figure 1, we used a double-edge notched “transverse plane-strain” specimen geometry to obtain a near transverse plane-strain deformation condition u
Data Loading...
