Wear and Adhesion of thin Carbon Coatings
- PDF / 2,495,280 Bytes
- 6 Pages / 414.72 x 648 pts Page_size
- 84 Downloads / 343 Views
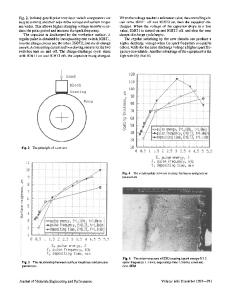
sputtering The final thickness of the diamond-like carbon coating was about 1800 A. Continuous microscratch and nanoindentation tests All of these microscratch and nanoindentation experiments were performed by using a load and depth sensing indentation instrument sensitive to the nanoscale. The load cell has a capacity of 0.9 N and a load resolution of 16 g.tN. The diamond indentor was driven horizontally and vertically into the specimen by a piezoelectric transducer (PZT) for displacement and load control with the data being collected and recorded by an IBM personal computer. Continuous microscratch tests of the F-75 alloys are made by using displacement control with a fixed microscratch speed of 0.5 l.tm/s on uncoated and diamond-like carbon coated F-75 alloy substrates using a 1 gim conical diamond indentor. Separate microscratch tests were also performed at a fixed load on as-received and diamond-like carbon coated crystal Ni 3 A I intermetallics with a Y_ 5 boundary. Ni 3 AI belongs to a L1 2 , FCC crystal structure class. Instruments for microstructural analysis The microstructural observation of the diamond-like carbon coating was characterized by using a JOEL 840 Scanning Electron Microscope with an operation voltage of 20 KV. RESULTS AND DISCUSSION Nanoindentation of the diamond-like carbon coating The relationship between applied load and indentation depth of the diamond-like carbon coating is shown in Fig. 1. The high elastic response of the diamond-like carbon coating was seen from the small area hysteresis between the loading and unloading curves. By using the unloading portion of the curve and the techniques developed by Oliver and Pharr[5,6], the hardness of the diamond-like carbon coating was calculated to be 22.9 ± 2.1 GPa. 0.0015 i1
*
0.001
1
0
s.:
.-
s*
• .... ....e .. .. ................. ........... ........ .............. .... .... .......i ..... ...
0.0005
.. ...--
.06
0*
_ 2' . .. . .
0
0
0.01
0.02
0.03
Depth (um) Fig. I Nanoindentation of the diamond-like carbon coating.
762
0.04
0.05
Continuous microscratch tests After the continuous microscratch tests, the slip line pattern and associated plastic strain development were found to depend on the orientation for each crystal grain relative to the microscratch direction for as-received uncoated F-75 alloys (Fig.2). The severity of the anisotropy is partially due to F-75 alloys having an hexagonal close packed (HCP) structure. The HCP structure has a limited number of active slip system at room temperature which results in a high anisotropy for F-75 alloys. The plastic deformation produced by scratching is formed with a pattern in which deformation due to indentation produces a continuous series of interacting slip lines in a row along the scratch direction. There is also an associated small load drop due to the formation of slip lines and the resulting plastic energy dissipation. These slip lines were activated in the subsurface positions of maximum resolved shear stress generated which exceeds the critical resolved sh
Data Loading...


