Metallurgical factors affecting the crack growth resistance of a superalloy
- PDF / 938,283 Bytes
- 5 Pages / 612 x 792 pts (letter) Page_size
- 28 Downloads / 374 Views
AN
important prerequisite for a superalloy intended for gas turbine disc application is that it have good c r a c k growth resistance. Most c o m m e r c i a l disc allo~-s meet this requirement at low temperatures; however, in these alloys c r a c k propagation can o c c u r u n d e r relatively low s t r e s s conditions at temperat u r e s w h e r e c r e e p is a significant factor (generally above 600°C). ' In the present study, the c r e e p fracture of a potential disc superalloy, IN-792 was examined. The results indicate that g r a i n size and g r a i n shape can be controlled to significantly r e t a r d c r a c k propagation during c r e e p loading. EXPERIMENTAL
(2.1 cm x 3.1 cm). Test blanks were cut from the extruded bar such that the c r e e p c r a c k would propagate a c r o s s the bar in s t r e s s rupture specimens and down the length of the bar in the fracture toughness specimens. S t r e s s Rupture Smooth s t r e s s rupture specimens, as outlined in ASTM designation E-8, were tested at 760°C u s i n g s t r e s s levels ranging from 590 to 650 MN/m2. The specimens were fabricated from heat treated blanks u s i n g a Sheffield grinder. Tests were conducted according to standard ASTM conditions.
PROCEDURE
Cast and Wrought IN-792 The C/W material was a 6350 kg heat that was initially vacuum induction melted. Its composition is listed in T a b l e I. A consumable r e m e l t ingot (30 cm diam, 51.0 cm long, and 2260 kg) was pressed forged at 1120°C in t h r e e s t e p s with a total reduction of 80 pct. Radially oriented blanks were cut from a disc segment. Extruded Powder IN-792 The P/M alloy was a r g o n atomized u s i n g vacuum induction melt stock. Its composition is shown in Table I. Powder of - 60, +325 mesh size was placed in a stainless s t e e l can (8.7 cm diam × 22.5 cm long), evacuated, heated at 315°C for 12 h, and hermetically sealed from the atmosphere. The can was soaked at 1150°C for 3 h and extruded through a rectangular die J. M. LARSON is ChiefEngineer, Automotive Components Division, Eaton Industries, BattleCreek MI. S. FLOREEN is Research Fellow, The InternationalNickel Company, Inc., PaulD. Merica Research Laboratory, Sterling Forest,Suffern, NY 10901. Manuscript submittedFebruary 3, 1976. METALLURGICAL TRANSACTIONS A
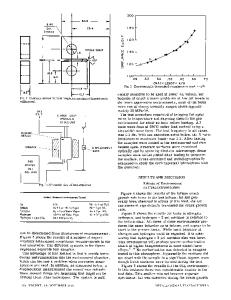
Fracture Mechanics The specimen for this test was a 9.2 mm thick compact tension, fracture toughness sample.' The samples were fatigue precracked at room temperature at a low stress intensity range. Each sample was then held in clevis grips by pins through the holes and the creep furnace was placed around it and brought to temperature. After the temperature had stabilized, the load was applied through the lever arm system of the creep stand. Plane strain loading conditions were achieved during slow crack growth.I Heat Treatment A heat treatment study was conducted on both C/W and P/M materials. The alloys were solution treated in the temperature r a n g e from 1120 to 1230°C to det e r m i n e g r a i n size as a function of temperature. T h e s e dat
Data Loading...


