A general method for estimation of fracture surface roughness: Part II. Practical considerations
- PDF / 991,110 Bytes
- 7 Pages / 594 x 774 pts Page_size
- 75 Downloads / 262 Views
I.
INTRODUCTION
THE
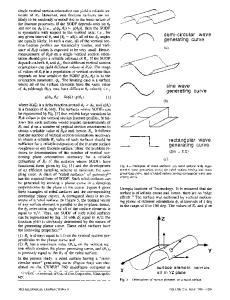
surface roughness parameter is a quantitative index of fracture surface roughness. The nature of fracture surface and its roughness depend on the material chemistry, microstructure, and the deformation and fracture process that lead to fracture. In Part I, t~l a general theoretical treatment has been presented for the estimation of the fracture surface roughness parameter, Rs, from the measurements performed on the vertical section fracture profiles. Such fracture profiles are lines (usually of irregular shape) generated by intersections of the fracture surface with the metallographic sectioning planes perpendicular to the average topographic plane of the fracture surface. Thus, all of the vertical sectioning planes contain the direction normal to the average topographic plane of the fracture surface; this common direction or "zone axis" is called the "vertical axis." The estimation of the fracture surface roughness parameter, Rs, involves the following measurements on the vertical section fracture profiles. (1) the fracture profile roughness parameter, RL, which is equal to the true length of the fracture profile divided by its apparent projected length (overlaps not counted) on a line perpendicular to the vertical axis and in the corresponding vertical sectioning plane E21(Figure 1), and (2) the profile structure factor, 6, defined as follows: tll qJ-=
f[ f0 sin0
I c o s ( 0 + 7 r / 2 - a)l.f(a)dadO
[11
where a is the angle between the tangent to an arc element on the fracture profile and the vertical axis (Figure 1); it specifies the angular orientation of an arc element. In general, different line or arc elements on a fracture profile have different angular orientations; f(c 0 is the frequency distribution function of arc element orientations in the fracture profile. Thus, f(a) da is equal to the frac-
A.M. GOKHALE, Associate Professor, and W.J. DRURY, Graduate Research Assistant, are with the School of Materials Engineering, Georgia Institute of Technology, Atlanta, GA 30332-0245. Manuscript submitted August 28, 1989. METALLURGICAL TRANSACTIONS A
tion of profile length in the orientation range a to (a + da). For the present purpose, 0 is simply a dummy variable of integration in Eq. [ I ]. Thus, 0 is completely determined by f(o0. The parameters RL and 6 can be experimentally measured. In general, vertical sectioning planes of different angular orientations may result in fracture profiles having different values of RL and 6. It can be shown that tlJ
Rs = RL" q,
[21
where RL" 6 is an expected or average value of the product of RL and 6 on a set of vertical sectioning planes. Note that an average value of the product of R,~ and 6, and not the product of the average values of RL and ~, is the quantity equal to Rs. Equation [2] is absolutely general, and it does not involve any assumptions conceming the nature of the fracture surface. This result forms the basis for an assumption-free and unbiased estimation of the fracture surface roughness parameter, Rs, from the measurements of R
Data Loading...


