An improved technique for determining hardness and elastic modulus using load and displacement sensing indentation exper
- PDF / 2,155,361 Bytes
- 20 Pages / 576 x 792 pts Page_size
- 51 Downloads / 593 Views
G. M. Pharr Department of Materials Science, Rice University, P. O. Box 1982, Houston, Texas 77251 (Received 23 December 1991; accepted 22 January 1992)
The indentation load-displacement behavior of six materials tested with a Berkovich indenter has been carefully documented to establish an improved method for determining hardness and elastic modulus from indentation load-displacement data. The materials included fused silica, soda-lime glass, and single crystals of aluminum, tungsten, quartz, and sapphire. It is shown that the load-displacement curves during unloading in these materials are not linear, even in the initial stages, thereby suggesting that the flat punch approximation used so often in the analysis of unloading data is not entirely adequate. An analysis technique is presented that accounts for the curvature in the unloading data and provides a physically justifiable procedure for determining the depth which should be used in conjunction with the indenter shape function to establish the contact area at peak load. The hardnesses and elastic moduli of the six materials are computed using the analysis procedure and compared with values determined by independent means to assess the accuracy of the method. The results show that with good technique, moduli can be measured to within 5%.
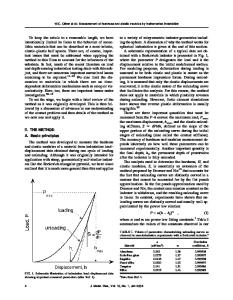
I. INTRODUCTION Great strides have been made over the past few years in the development of techniques for probing the mechanical properties of materials on the submicron scale.1 3 The advances have been made possible by the development of instruments that continuously measure force and displacement as an indentation is made.4"7 The indentation load-displacement data thus derived can be used to determine mechanical properties even when the indentations are too small to be imaged conveniently. Since the indentation positioning capability of some of the instruments is also in the submicron regime, a means is available by which the mechanical properties of a surface can be mapped with submicron resolution. An instrument with such capabilities can be described as a mechanical properties microprobe.8~10 The two mechanical properties measured most frequently using load and depth sensing indentation techniques are the elastic modulus, E, and the hardness, H. In a commonly used method, data are obtained from one complete cycle of loading and unloading.3 The unloading data are then analyzed according to a model for the deformation of an elastic half space by an elastic punch which relates the contact area at peak load to the elastic modulus. Methods for independently estimating the contact area from the indenter shape function are then used to provide separate measurements of E and H. 1564
J. Mater. Res., Vol. 7, No. 6, June 1992
The elastic contact problem, which plays a key role in the analysis procedure, was originally considered in the late 19th century by Boussinesq11 and Hertz.12 Boussinesq developed a method based on potential theory for computing the stresses and displacements in an elastic body loaded by a rigid, axisymmetr
Data Loading...


