Substructure and strengthening mechanisms in 2.25 Cr-1 Mo steel at elevated temperatures
- PDF / 3,829,997 Bytes
- 12 Pages / 594 x 774 pts Page_size
- 18 Downloads / 318 Views
WENDELL B. JONES and J. A. VAN DEN AVYLE are Members of the Technical Staff, Sandia National Laboratories, .~Ibuquerque, NM 87110. Manuscript submitted May 4, 1979.
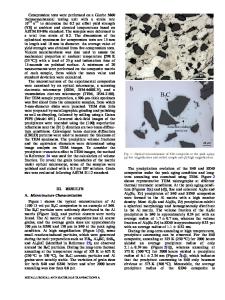
steels, 5,6including 2.25 Cr-1 Mo steel, exhibit solid solution hardening and dynamic strain aging effects in tests conducted above 723 K where carbon alone cannot account for the strengthening. 2,3 In the absence of carbon, Fe-Cr-Mo alloys do not display any strengthening in the 723 to 873 K temperature range. These observations led Baird and Jamison 5,6 to conclude that carbon affinity for both dislocations and Cr and Mo could account for this elevated temperature strengthening and this phenomenon was termed "interaction solid-solution hardening". In this way, the strength of 2.25 Cr-1 Mo alloy is very sensitive to the concentrations of Cr and Mo in the ferrite matrix. This paper presents the results of several fatigue and creep tests together with transmission electron microscopy observations of the microstructural changes occurring during the tests. The purpose of the work was to observe the deformation and precipitation processes in order to better understand the mechanisms which determine the elevated temperature mechanical properties of 2.25 Cr-1 Mo steel.
2. E X P E R I M E N T A L 2.1 Material Creep and fatigue test specimens were cut from a 25.4 mm thick plate of a heat of 2.25 Cr-1 Mo steel designated 3P5601, a heat that has been extensively characterized. 1The chemistry of this heat is given below. Chemical Composition of Heat No. 3P5601 (Weight Pct) Cr
Ni
Mo
Mn
Cu
Si
C
Fe
2.3
0.2
0.96
0.35
0.03
0.27
0.119
balance
This plate had received at Oak Ridge National Laboratory an isothermal annealing treatment which is defined by: austenitize at 1200 ___ 14 K for 1 h, cool to 977 ___14 K at a maximum cooling rate of 83 K/h, hold
ISSN 0360-2133/80/0811-1275500.75/0 METALLURGICAL TRANSACTIONS A 9 1980 AMERICAN SOCIETY FOR METALS AND THE METALLURGICAL SOCIETY OF AIME
VOLUME 1IA, AUGUST 1980--1275
at 977 _+ 14 K for 2 h, and cool to room temperature at a rate not to exceed 6 K/rain.
2.2. Creep and Fatigue Testing Creep specimens and low cycle fatigue specimens were machined from the plate with their axes parallel to the rolling direction of the plate. The creep specimens had a 12.7 mm diam by 64 mm long gage section with button ends for gripping. Constant load creep testing was carried out on a creep frame with a 20:1 loadmagnifying lever arm which was self-leveling. Heating was by a resistance tube furnace with temperature control to _+ 1 K. Continuous strain measurements were made using a linear variable displacement transformer extensometer with a 50 mm gage. All tests were at 866 K. Strain controlled fatigue testing was conducted using servo-controlled hydraulic test frames with diametral strain control; the hour-glass shaped fatigue specimens were induction heated. Initial fatigue tests were conducted in air, but oxidation of the specimen surfaces during long tests with hold periods caused a significant loss of surface mater
Data Loading...


