The role of texture in work hardening of copper
- PDF / 350,999 Bytes
- 4 Pages / 594 x 774 pts Page_size
- 13 Downloads / 326 Views
was cold swaged to 75 pct reduction in area and annealed 1 h in vacuum at 900 ~ to produce a (111) wire texture. 1~The rod was then cold swaged an additional 45 pct and machined into four tensile specimens with 5 m m gage diam and 28 mm gage length. Two of these specimens were annealed 1 h at 900 ~ (called "B900" below): the other two were annealed 150 h at 750 ~ ("B750"), all in vacuum. Short pieces of the rod were annealed together with tensile specimens to provide specimens for metallography and texture measurement. The copper castings were made from the same original rod material, using a vacuum melting and pouring facility. Experimentation with coolant flow rates in a water-cooled copper mold permitted production of semi-circular cast rods (19 m m diam) which were essentially entirely composed of equiaxed grains. Transverse slices of these rods were spark-machined, using the lowest spark setting, for metallography and texture measurement: 5 m m • 5 m m x 7 mm compression specimens and 5 m m x 5 mm • 30 mm tensile specimens were similarly made from the cast rods. Cut surfaces were electropolished to remove any spark damage, and then all pieces were annealed 24 h at 900 ~ in vacuum. The tensile specimens were then brazed into threaded brass shoulders and re-annealed, using the technique described earlier 2 for single crystals. Tensile and compression tests were performed at an initial strain rate of 8 • 10 3 s- J at room temperature. Compression specimens were lubricated: these tests extended only to 5 pct strain, as they were intended to serve as a check on the low-strain tensile data for cast material. Tensile tests were continued to fracture. Grain sizes of materials tested, expressed as true volume diameter, u were as follows: B900, 160/~m: B750. 125 /~m; cast material, 405/~m. Texture measurements on the above materials and on the 3.4, 15 and 150-/~m grain size materials studied earlier 7-9were made on mounted and electro-polished surfaces which were normal to the stress axis (if any) used in mechanical processing of material. An automated pole-figure goniometer was used to make measurements by the Schulz reflection method. 12 Results as a function of rotation angle were corrected for differences in illuminated area A and expressed as intensities I relative to random (subscript r), where the random values were obtained from a specimen of sintered
ISSN 0360-2133/81/0311-0531500.75/0 9 1981 AMERICAN SOCIETY FOR METALS AND THE METALLURGICAL SOCIETY OF AIME
VOLUME 12A, MARCH 1981--531
I
I
I
I
I
I
J
I
I 30
150 ,u.m~ 3O(
- 200 u~
100 I
I
I
i0
.20 TRUE STRAIN
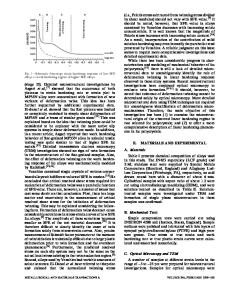
Fig. 1 - - T r u e stress-true strain curves for the cast copper and B900 material of the present study, compared to previous data 9 for 3.4/~m and 150 ttm grain size. A portion of the curve for the cast specimen is omitted near 0.15 strain for clarity.
I
I
I 150
1
I
I
I
I
/xm
, - 20(]
/7/,, ~
~ 1~~ ~ _ F
(111) I
l I0
E
20 TRUE STRAIN
I
30
Fig. 2 - - T r u e stress-true strata curves for three copper grain sizes,9 for a
Data Loading...


