Depth-Dependent Hardness Characterization by Nanoindentation using a Berkovich Indenter with a Rounded Tip
- PDF / 105,147 Bytes
- 6 Pages / 612 x 792 pts (letter) Page_size
- 71 Downloads / 425 Views
O2.4.1
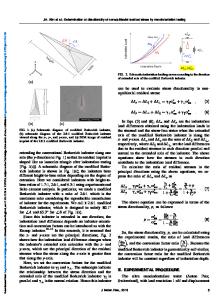
Depth-Dependent Hardness Characterization by Nanoindentation using a Berkovich Indenter with a Rounded Tip Ju-Young Kim1, David T. Read2, and Dongil Kwon1 1 School of Materials Science and Engineering, Seoul National University, Seoul 151-744, South Korea 2 Materials Reliability Division, National Institute of Standards and Technology, Boulder, CO 80305, USA ABSTRACT The height difference ∆hb between the ideally sharp Berkovich indenter tip and a rounded tip was measured by direct observation using atomic force microscopy (AFM). The accuracy of the indirect area function method for measuring ∆hb was confirmed. The indentation size effects (ISE) in (100) single crystal copper, (100) single crystal tungsten, and fused quartz were characterized by applying the ISE model considering the rounded tip effect. The model fits the data these materials well, even though fused quartz does not deform by dislocations. However, a very small value of the ISE characteristic length h' was obtained for fused quartz. The present h' value for (100) copper is 32% larger than a previously-measured value for polycrystalline copper. This may indicate that grain boundaries suppress the dislocation activity envisioned in the ISE model. INTRODUCTION The nanoindentation technique has been established as a powerful means to characterize the mechanical properties of small volume-material [1,2]. However, it has always been difficult to precisely determine the mechanical properties of micro/nano-materials by nanoindentation because of the well-known indentation size effect (ISE), that is, the hardness increase with decreasing indentation depth in the sub-micrometer range [3,4]. Nix and Gao clearly showed that the ISE in crystalline materials can be explained on the basis of the concept of geometrically necessary dislocations (GNDs) [5]. As more and more experimental results are reported, researchers find that the Nix-Gao model cannot accurately fit all the experimental results, especially for indentation depth less than about 100 nm [6]. Many researchers have extended the Nix-Gao model to address this problem; in particular, J.-Y. Kim et al. extended the ISE model by considering the rounded tip effect on ISE [7]. In the present study, we report an improved experimental method to accurately measure the bluntness of the rounded tip. This value is used
O2.4.2
in the extended ISE model to analyze experimental nanoindentation data on (100) single crystal copper, (100) single crystal tungsten, and fused quartz. MODEL REVIEW AND EXPERIMENTAL DETAILS The hardness is written as H h' = 1+ J , H0 hc
(1)
where H is the hardness, hc is the contact depth, H 0 is the macroscopic hardness, h' is the characteristic length for ISE, and J is the scaling factor for the ISE considering the rounded tip effect [7]. J is expressed as ⎛ ∆h J = χ ⎜⎜1 + b hc ⎝
−2
⎞ ⎟⎟ , ⎠
(2)
where ∆hb is the height difference between the ideally sharp tip and the rounded tip, and χ is the ratio of plastic to total contact depth. The χ term involves the elastic recovery effe
Data Loading...


